How to create your first client
Create a client with a connected Meta or Google account, appropriate assignees, and the right AI authorization.
Examples use “Clients”. If you manage ads for your own company, this section is called “Companies”. The steps are the same.
Copy the article as Markdown to paste it into an AI agent.
Before you begin
- At least one Meta Ads or Google Ads account already connected to the Workspace.
- Confirm the Workspace and the ad account that belongs to the client.
Expected result
Your first client will be created in the correct Workspace with at least one linked ad account, assigned team members, and a deliberately chosen AI mode.
Before you start
The current client form requires an already connected Meta Ads or Google Ads account. If no account is available, connect the provider first.
Requirements
- A company name between 3 and 100 characters.
- At least one Meta Ads or Google Ads account from the Workspace.
- An active subscription and room within the plan's client limit.
- A report password with at least 6 characters if you choose to use one.
Permissions
Owners, Admins, and Members can create clients. Viewers cannot.
Steps
- Confirm the active Workspace.
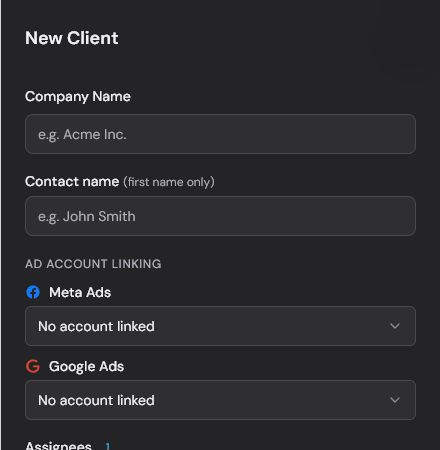
- Open Clients and select New Client.
- Enter the Company Name.
- Optionally enter the contact's first name.
- Under Ad Account Linking, select at least one Meta Ads or Google Ads account.
- Under Assignees, choose the people responsible for the client.
- Under Authorize AI actions, choose Do not authorize, Recommend only, or Authorize edits.
- If public reports need protection, enter a valid password under Report access password.
- Review the details and select Create Client.
Validation
The client should appear in the list. Open or review its card and confirm the linked ad account, assignees, and AI mode. Complete this check before creating campaigns or resources.
Troubleshooting
- If Create Client remains blocked, check the name and select at least one account.
- If the account is missing, review Integrations and the active Workspace.
- If a subscription or plan limit blocks creation, resolve that state before trying again.
- If the client is created but its account or assignees are not shown as expected, refresh the list and review the client before creating another one.
Limits and safeguards
Do not use another client's ad account just to complete the form. Authorize edits allows AI actions in the provider when applicable flows run. Choose Recommend only when the team must approve changes manually.
Related articles
- How to connect Meta safely.
- How to connect Google safely.
- Roles, permissions, and team access.
Was this article helpful?
Related articles
- How to connect Meta safelyAuthorize the correct identity, review discovered accounts, and know when to reconnect.
- How to connect Google safelyAuthorize the correct Google account and review discovered direct accounts and MCC subaccounts.
- Roles, permissions, and team accessCompare Owner, Admin, Member, and Viewer before granting access.